
Table of contents
- Introduction
- App Requirements
- Getting Started for Git Administrators
- Installation
- Managing License Key
- Working with SSH Keys
- Git URL Ports
- Setting Up Repositories
- Using the Auto-Connect Integration Wizard
- Connecting a Repository via Advanced Setup
- Adding a Repository Hosted on Windows Servers or Windows Network Share
- Tracked Folder and Special Integrations
- Managing Repository/Integration Configuration
- Repository/Integration Project Permissions
- Bulk Change
- Commit Email Notifications
- General Settings
- Web Linking
- Disabling Source and Commits Tabs
- Linking Git Commits to Jira Issues
- Smart Commits
- Repository Browser
- Viewing Commit Code Diffs
- Git User Identity
- Jira User Information Card
- Jira Issue Page
- Jira Project Page
- Jira Developer Panel
- Git Tags
- Reindexing
- JQL Searching
- Webhooks
- Jira Data Center (High Availability and Clustering)
- Localization
- Terms
- Licensing Notice
Documentation
Using the Auto-Connect Integration Wizard
The Auto-Connect integration panel contains special integration for specific git hosts, supports multiple connected repositories and automates git integration.
For more details on this topic, see the connection information for your favorite git host in our Integration Guides.
Using the Connect Wizard
- Click Connect to Git Repository. The Connect to Git Repository wizard is displayed.
- Enter required repository location. The Repository location can be any type of supported URL protocols as stated in the Location type examples.
- Click Next. The wizard will automatically detect the entered repository location type.
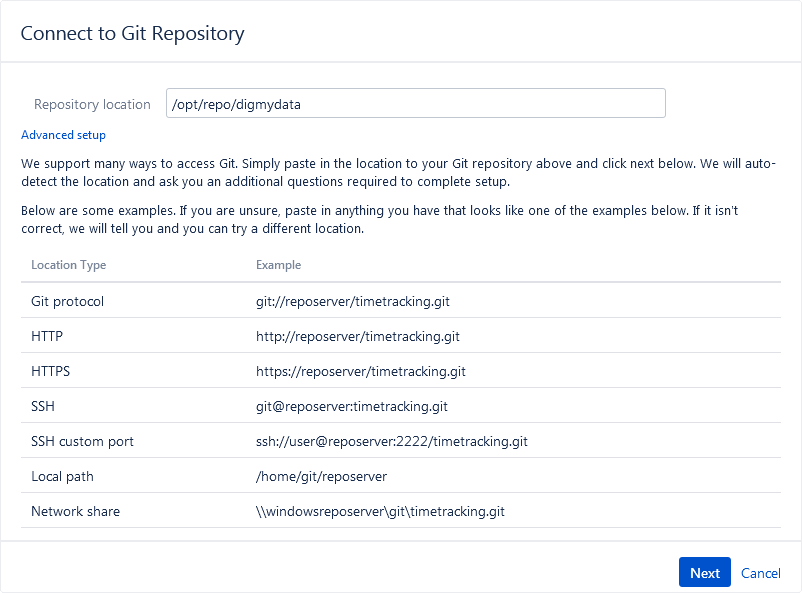
The detection works for most repositories. If a repository root points to a valid git repository, the repository origin is detected automatically. When a repository has no origin, the user has to specify it manually.
Starting v2.6.7 of the Git Integration app, the default identities are not used and the repository is created without the additional key upload.
Settings
In the Settings screen, you can configure features such as Smart Commits, Repository Browser and Project Permission settings.
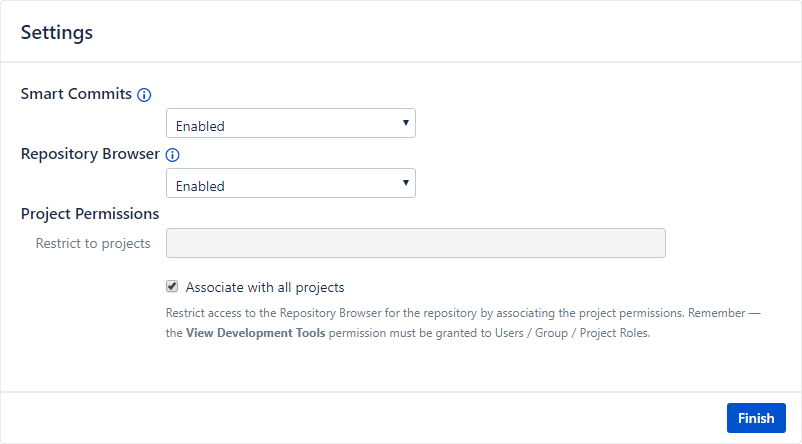
Enable or disable the Smart Commits setting for this repository as required.
For Project Permissions, set one or more projects in the Restrict to projects field to map this repository and make the Git Commits tab available in the Issue pages of the associated projects. Otherwise, leave the Associate with all projects setting to ON to associate this repository to all projects.
The level of permissions can be one of the following:
| Level | Process |
|---|---|
| Repository | Select a repository from the repository list. For integrations, view the integration then select a repository within (Actions > Show integration repositories). After the selection, you will be taken to the repository properties. Set the Project Permissions as follows:
|
| Integration | Select an integration from the repository list then open the integration properties (Actions > Edit integration feature settings). Set the Project Permissions as follows:
|
| All | This is the default setting where the Associate to all projects option is enabled. |
Click Next.
HTTP(S) Authentication
If the entered git clone URL requires http credentials, the following screen appears:
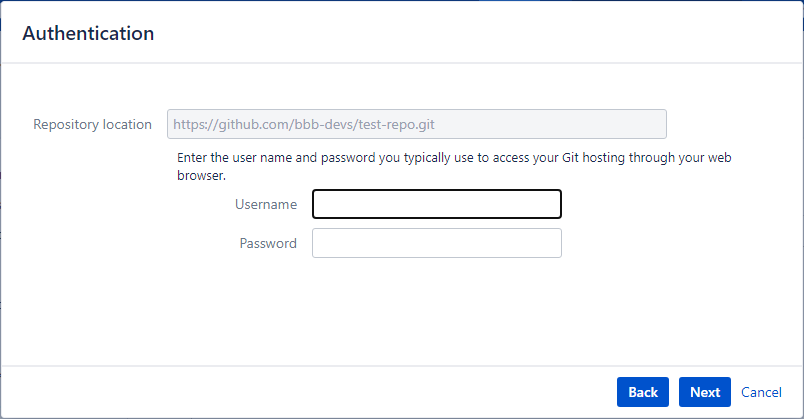
Provide Username and Password in the respective fields then click Next to continue.
SSH Authentication
For SSH git repository connections, the following screen is displayed for authentication: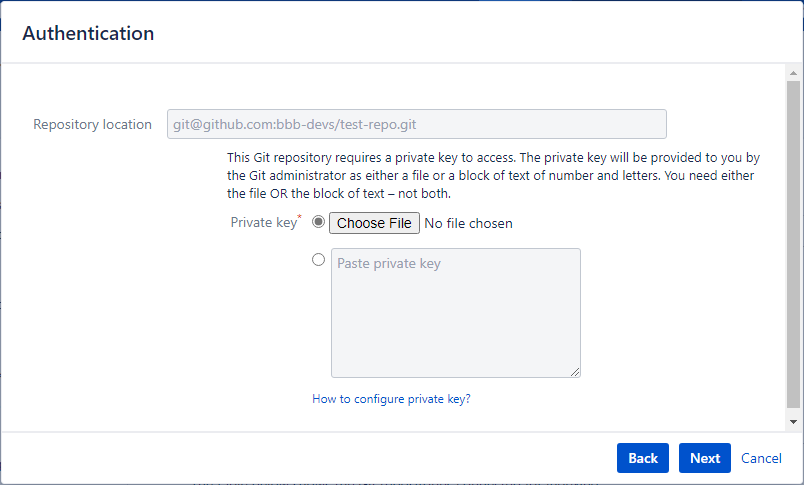
Upload the private key file via Browse... and navigate to the private key file or pasting the private key text into the provided box.
Take note that the SSH server is the Git server and the SSH client is the Jira server.
Click Next to proceed.
Passphrase Input
If the generated SSH key pair has a passphrase, you will see the following screen:
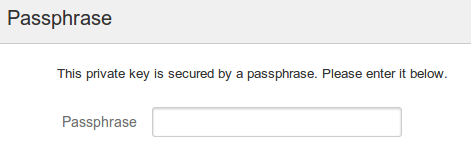
Enter the Passphrase for your private key. Click Next to continue.
After the above requirements are fulfilled, the wizard will:
- create a local copy of the git repository; and
- index the git repository to build change history.
Click Finish to close the wizard. The newly added repository appears on the integration list on the app repository configuration page.


